
Every Day Paper Mache Recipe
This is a safe, low cost paper mache clay recipe suitable for children to use or you can use it as an alternative to my Posh Paper Mache Mix if you don't have ingredients for it readily available at home.

When, over ten years ago, I abandoned using nasty fiberglass resin and expensive steel to make my work and first began using paper mache as a user friendly, cheap and cheerful sculpture medium, I originally went straight to using the traditional method of making paper mache that many of us have had a go at at school.
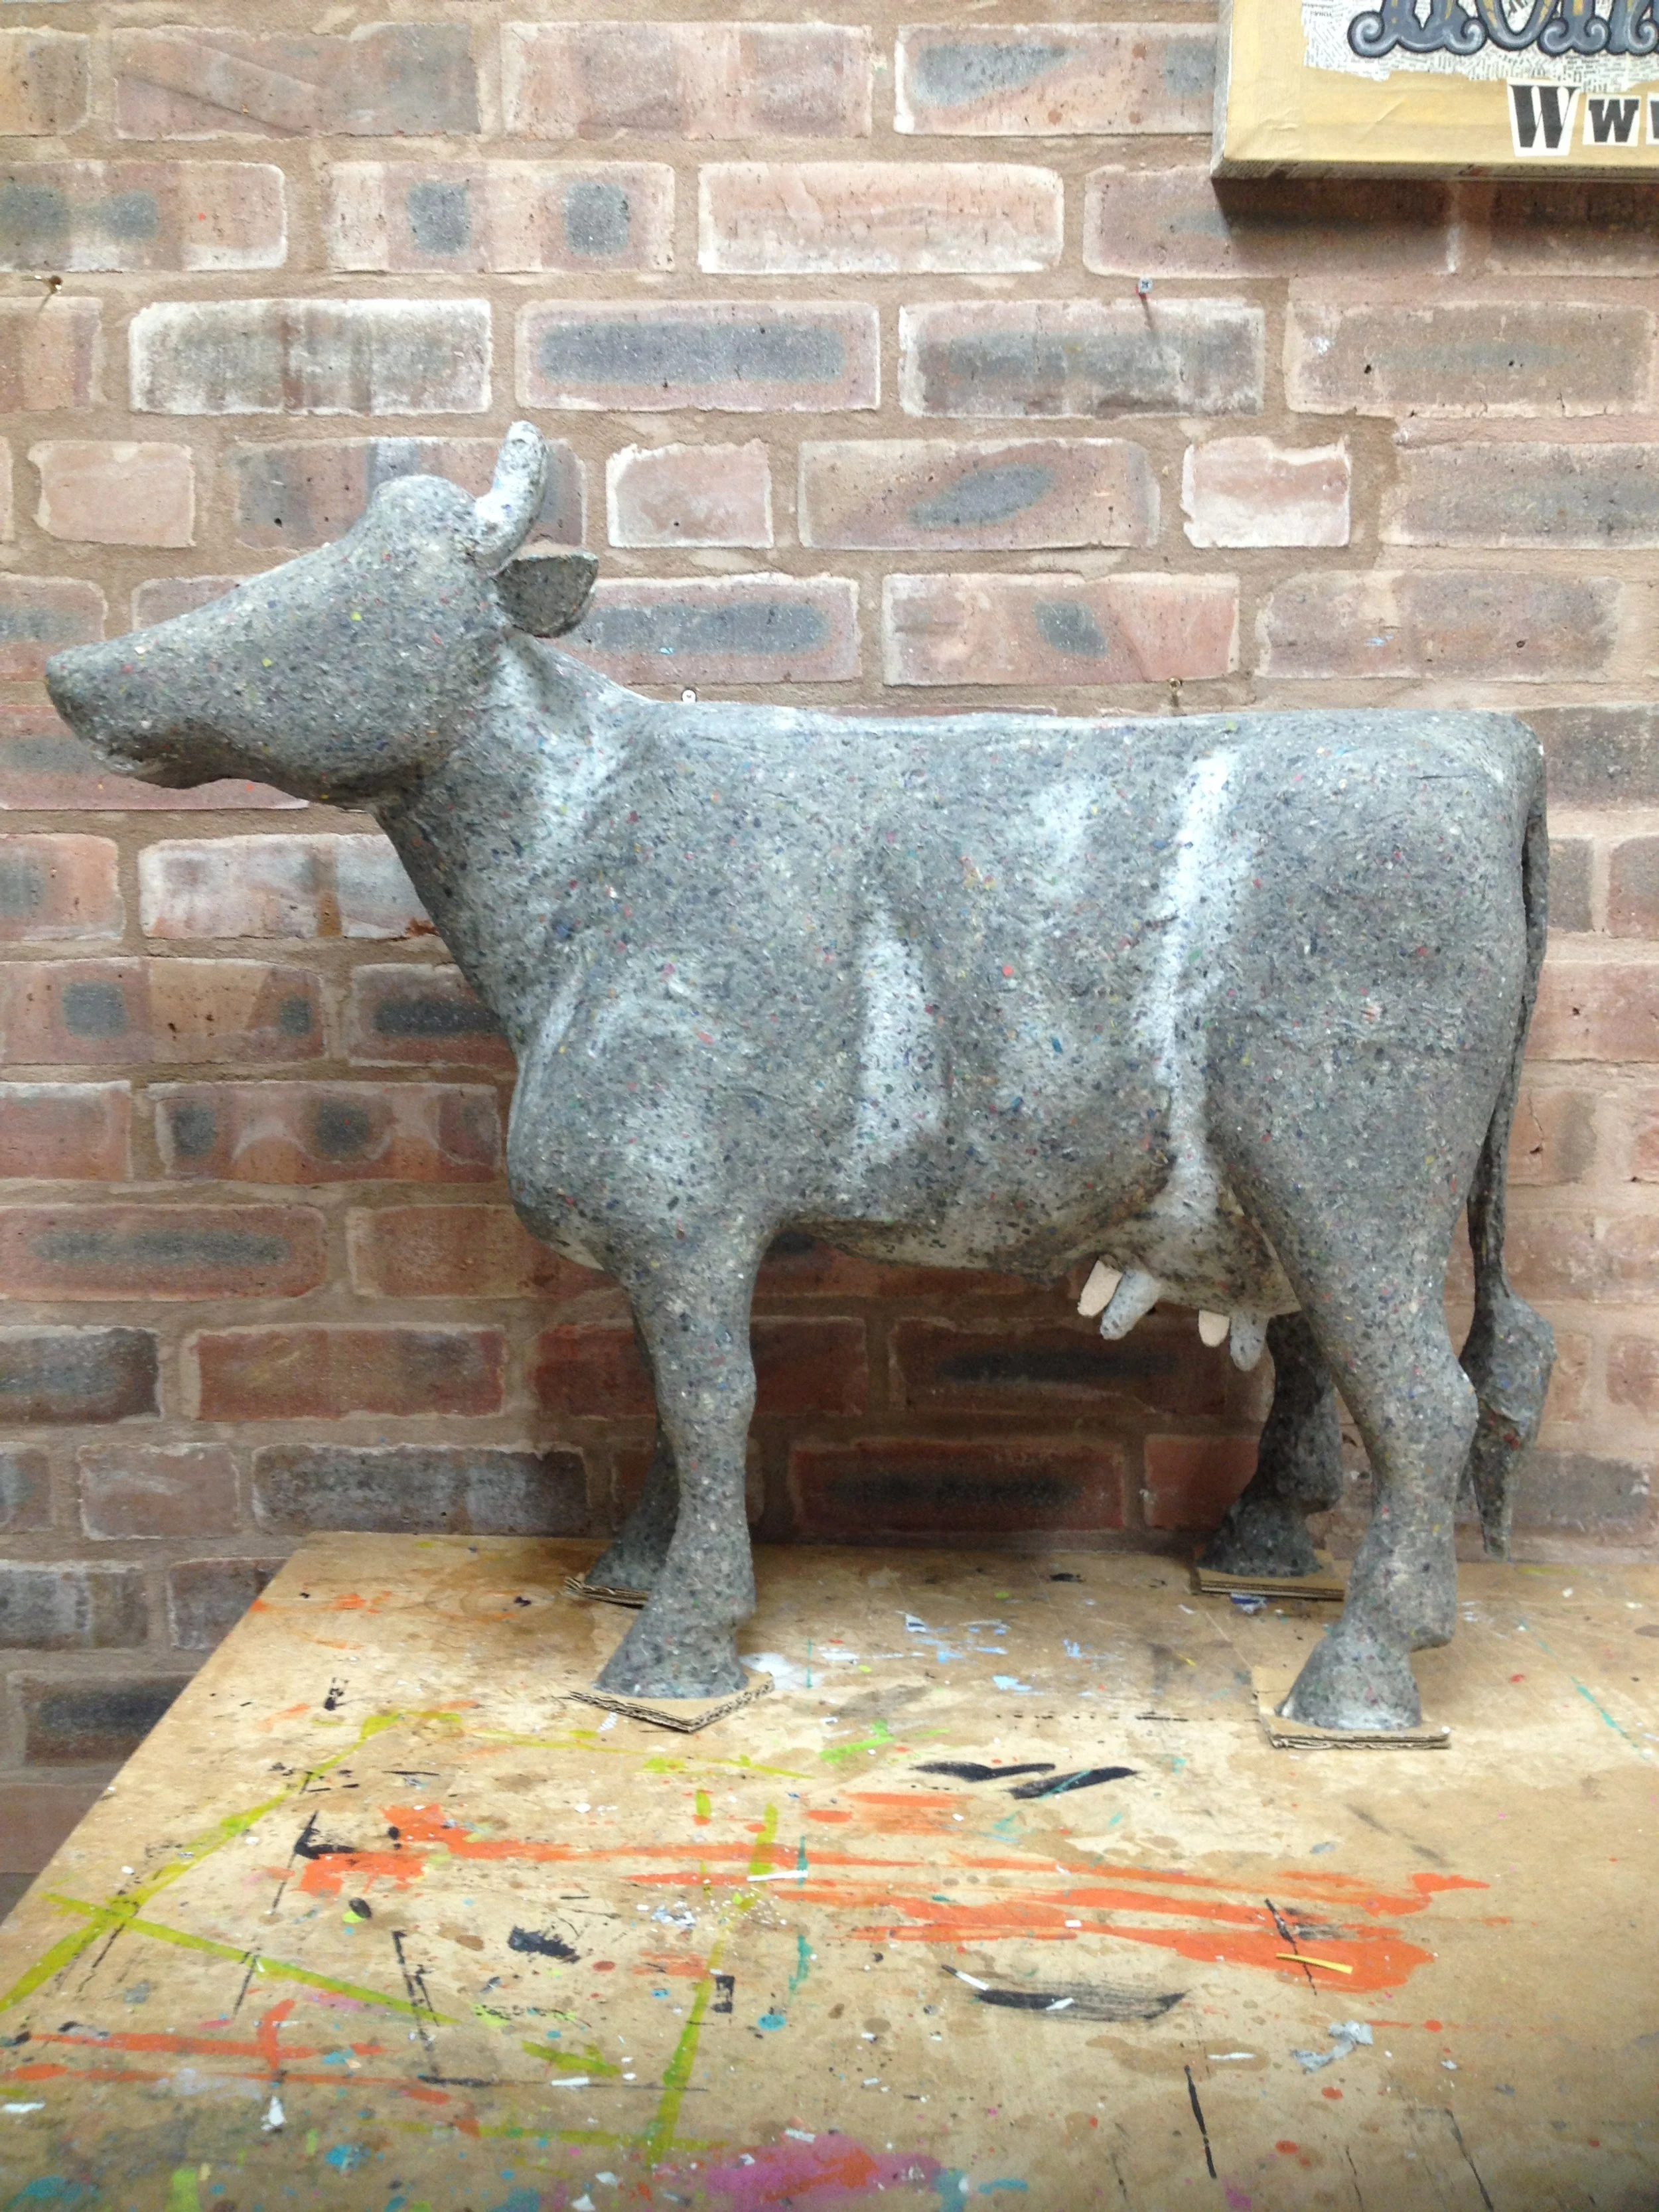
This large cow was created with my everyday paper mache recipe. Here it is in its raw, unpainted form.
This paper mache method is great for all sorts of projects, particularly if you are working with children, but I soon ran into difficulties with regard to making my own work suitable for sale to retail and the trade. I needed to be able to make sculptures quickly (ordinary paper mache can take a long time to dry out), they needed to be solid and not easily breakable and they needed to last indefinitely (whilst quite strong, it needed to be stronger).
And so after quite a bit of independent experimentation I adapted this traditional method of making paper mache and came up with my "Posh Paper Mache Mix" so that I could create solid durable sculptures that can last a long time for the retail industry and also go outside. This involved several additions and substitutions to the recipe. During this process of research I uncovered an interesting history of paper mache plus other freethinking people out there with the similar crazy ideas to me which I will share with you in other Blog articles.
My Posh Paper Mache Mix should only be used by adults as cement is involved, which is caustic when wet and can create dust when dry and requires using basic safety equipment, so if you want to avoid this yourself or are working with children try the user friendly and safe recipe below instead.

The finished “Lucky Cow” which has been fully decoupaged with paper and magazine cuttings.
Traditional Paper Mache Recipe:
This method is the next step up from dipping strips of newspaper into wallpaper paste that we have all had a go at at school, and will give you a sculptable paper mache "clay".
1/2 cup of soaked newspaper
1/2 cup PVA Glue
1/2 cup all-purpose flour (70 grams) to start
1 tablespoon boiled linseed oil (optional)
1 - 3 tablespoons of thick bleach (optional)
You can combine the first three ingredients to make a basic paper mache clay. I use ordinary newspapers, cut up into strips and then chopped into approximately 4 cm squares then soaked in a bowl of water for at least an hour. I find newspaper is the best paper to use as they are readily available and cheap or free. I like the U.K. tabloids, the Daily Mail or the Sun which have nice soft paper that disintegrates well when soaked and are a convenient size for cutting up!
My friend Diane, from the recycling website Trash Nothing supplies me with regular bulk batches of free newspapers for my prolific making. You can also try Freecycle or Ebay or asking your neighbours if you can raid their recycling box on rubbish collection day!
Once soaked you can decant a portion of both water and newspaper into another bowl and use a stick blender to turn it to mush (any household blender will do this job, but make sure you rinse straight away so your machine doesn't become clogged up with paper). You can soak your paper overnight, but beware, newspaper harbours germs and leaving a bowl of soaking newspaper lying around for too long can create a stagnant pond and possibly even a health hazard such as legionnaires disease!
Next, strain your liquified paper, I have used a garden sift for this successfully, but my preference is now a large sieve - anything with too large holes such as a kitchen colander will see you lose a lot of paper pulp back into your bowl or down the drain. (You can also make your own sheets of paper this way, which I might go into another time!).
Squeeze out your paper pulp so it is not too watery, but still a little wet, then mix in your flour - adding flour first will lessen the likelyhood of lumps. Then mix in your PVA - I use a butter knife to mix. Add glue slowly and keep mixing until you get a firmness similar to spreadable butter, you may not need all the glue depending on how much water is left in your paper pulp. If your mix is too lumpy for your liking you can add more flour and more PVA as the mixture will become more dry with the addition of more flour - the flour acts as a filler between the paper pulp disguising any lumps. I don't recommend using a mixer or blender to mix your mache so if you do clean it out straight away. You can always buy a cheap hand mixer to use as a dedicated tool for your artwork.
You can use this paper mache clay just as it is and it can be kept in the fridge in a tupperware box for a couple of days but much longer and it will become mouldy and should be thrown away.
The addition of boiled linseed oil will make the mix smoother and more easy to spread and the purpose of the bleach is to delay the development of any mould forming. I recommend you wear gloves if you are adding these ingredients and do not add bleach, which is to help prevent mould forming, if you are using this with children.
If any work you make with this recipe takes a long time to dry out, it may start forming mould on the actual piece of work. You can speed up drying and force dry your sculptures by putting them on top of a radiator or popping them in the oven for a few minutes on a low heat (just make sure you are attentive when you are doing this as too hot paper pulp may start to burn - make sure you don't set fire to your house!). Also beware that any hot glue that you have used in the process may re-melt if the heat is too high. I have actually bought a mini oven which will dry one or two of my little birds at about 100 degrees centigrade over one and a half hours, so this method does work quite well - too much heat may also cause cracking so the slower it dries the better.
Watch the video below to help you.